Cobot control
Warning
Note: this addon is not supported nor endorsed by Axilum Robotics. It is provided as-is.
Install
Install the Cobot addon with:
(NaviNIBS-env)...>pip install navinibs-cobot
Configuration
Enable addon
To use the Cobot integration, you need to enable the addon in your NaviNIBS session. This can be done via the GUI or by editing configuration files:
Open NaviNIBS
Go to the
Manage sessiontabClick
Enable addonbuttonBrowse to the
addon_configuration.jsonfile inside theNaviNIBS_Cobotdirectory (e.g. insite-packagesif installed via pip).Click
Open
Create a file called
SessionConfig_Addon_NaviNIBS_Cobot.jsonin your session directory.Add the following content to the file:
{
    "addonInstallPath": "..\\NaviNIBS_Cobot"
}
Edit the main
SessionConfig.jsonin your session directory. Create or append to an existingaddonslist to include the filename of the addon session config created above:"addons": ["SessionConfig_Addon_NaviNIBS_Cobot.json"],
Save the file and then open the session in NaviNIBS.
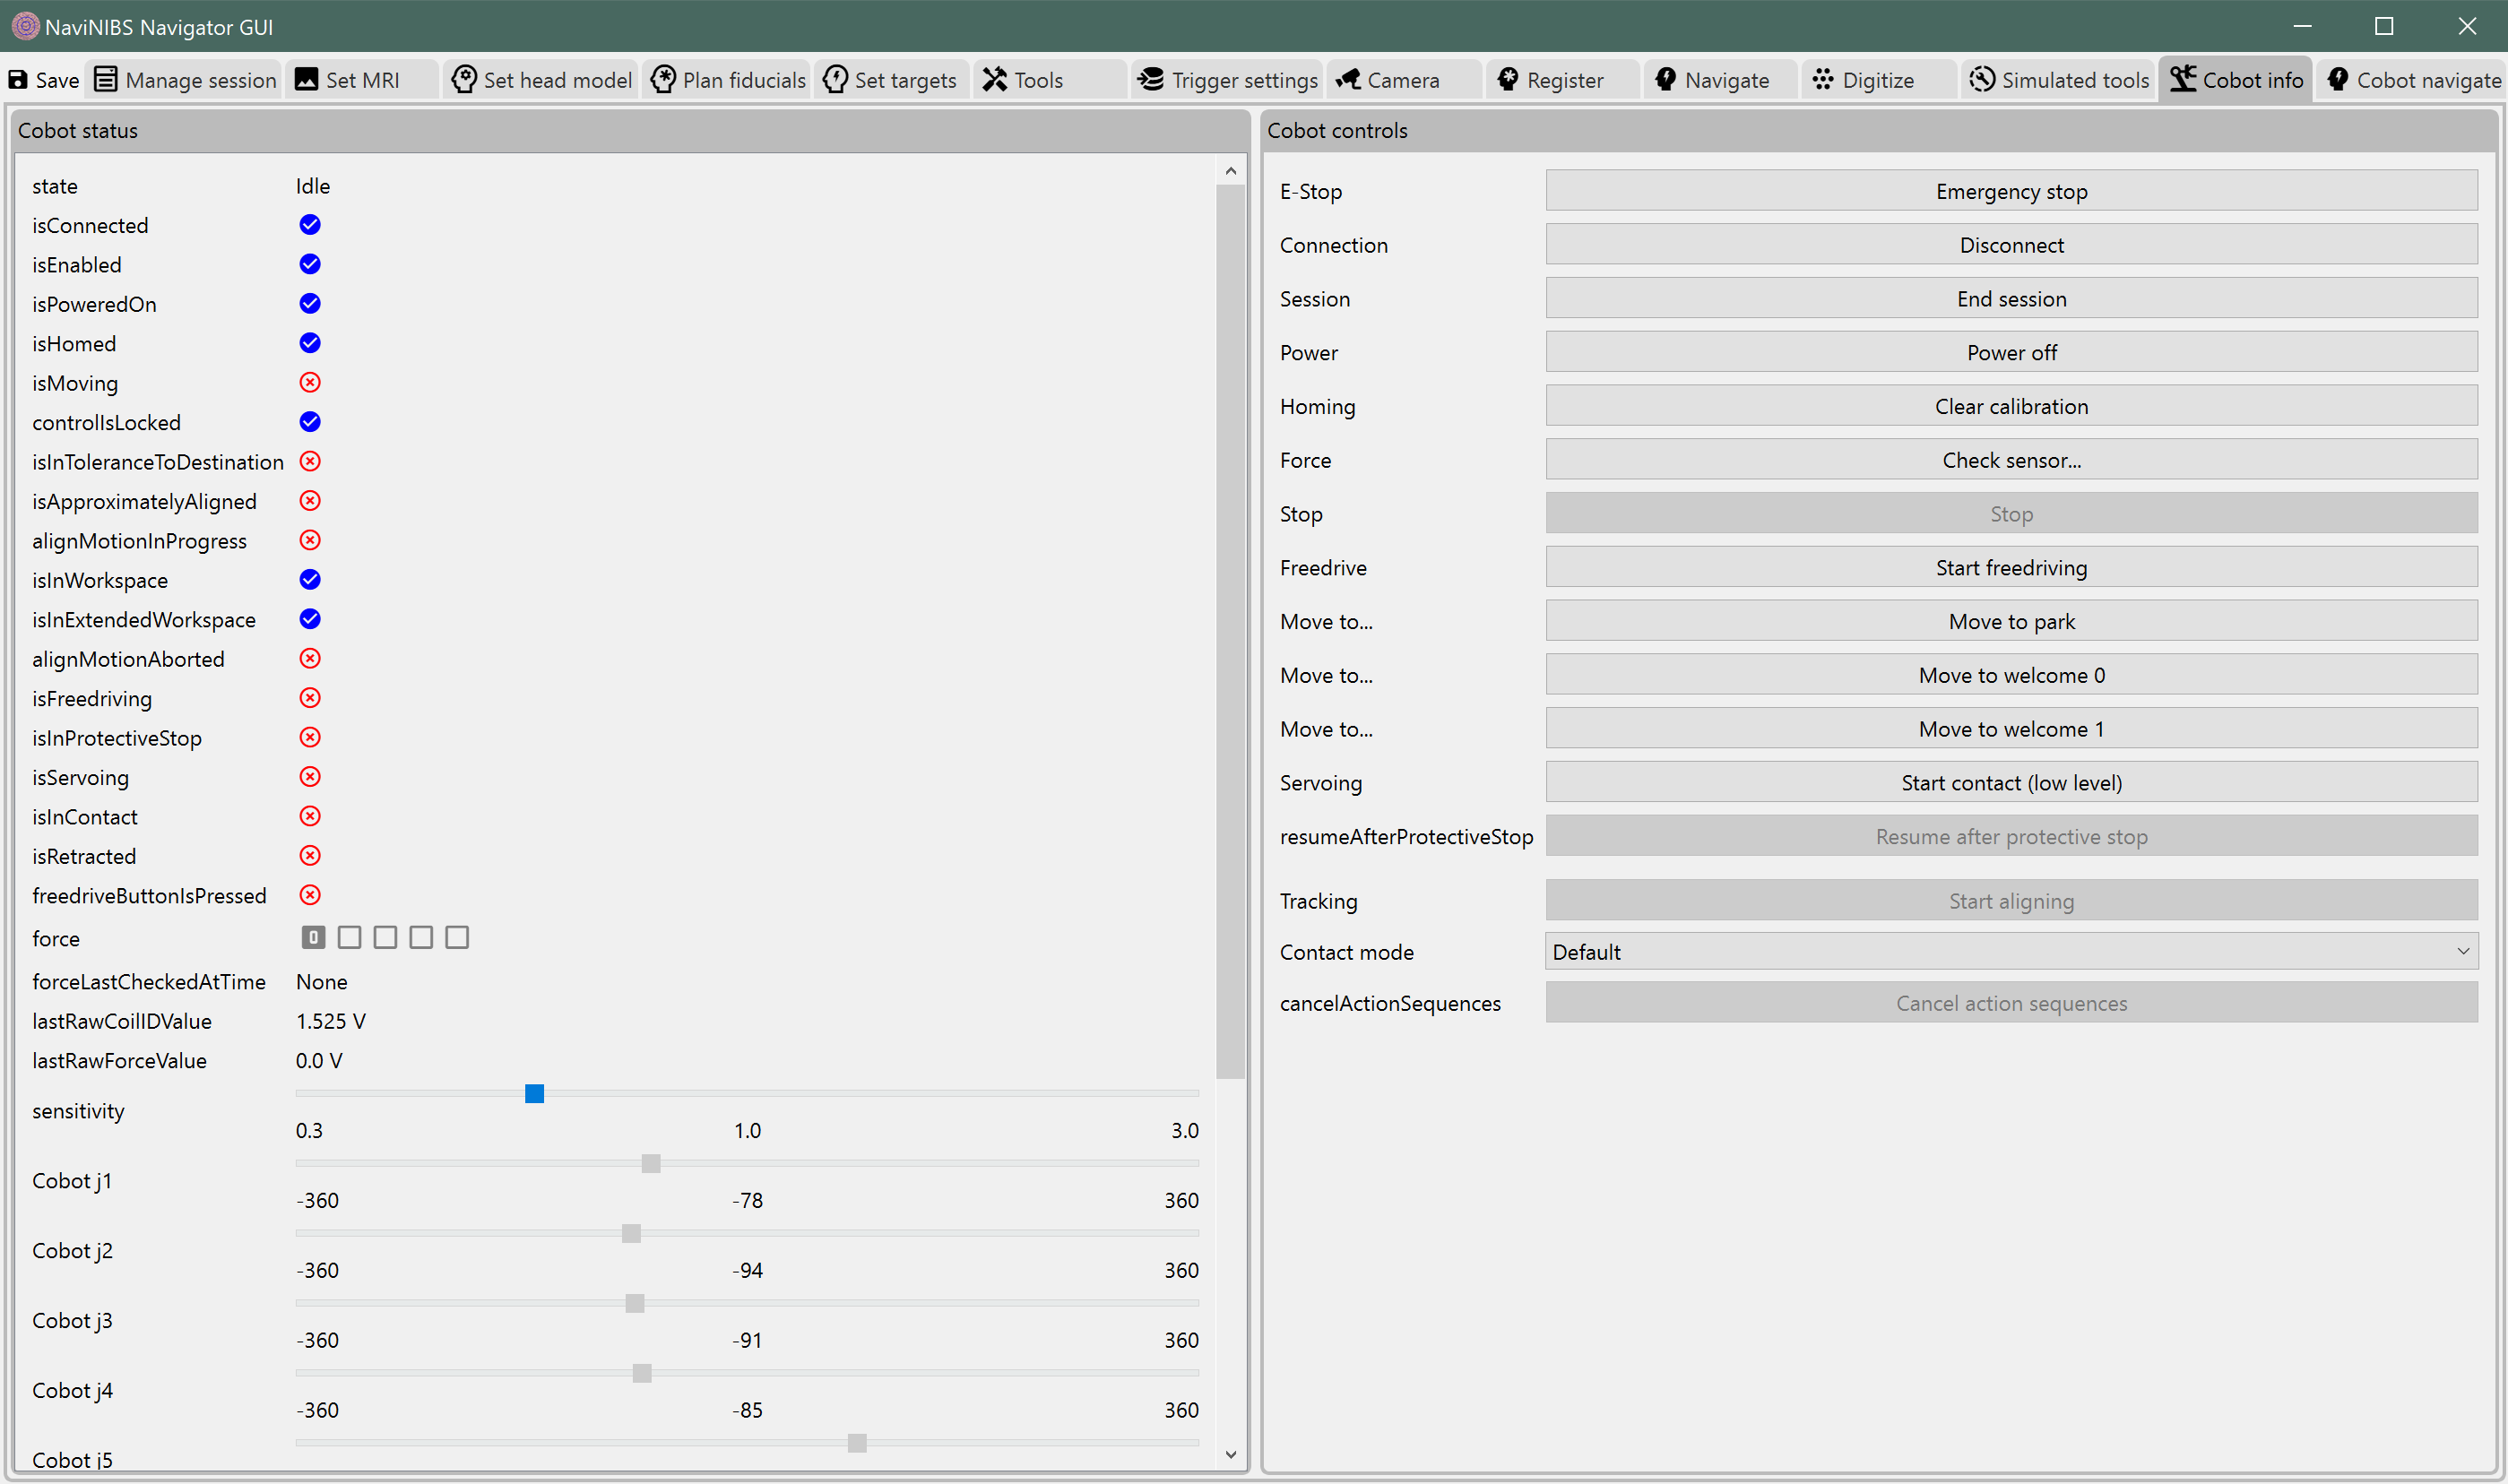
Once the addon is enabled, you should see Cobot info and Cobot navigate tabs in the main NaviNIBS window. However, you will not actually be able to connect to the Cobot until you specify the Cobot’s network address (see below).
Load Cobot-specific tools
You will also need to add Cobot-specific tool definitions to your session:
Open NaviNIBS
Go to the
ToolstabClick
Import tool settings from file...buttonBrowse to the
NaviNIBS_Cobotdirectory (e.g. insite-packagesif installed via pip).Browse to the
Devices\resourcessubdirectory.Select the
CobotTools.jsonfile.Click
Open
Find the provided tool file at
NaviNIBS_Cobot\Devices\resources\CobotTools.jsonAppend the contents of the JSON list in this file to the list in your existing session’s
SessionConfig_Tools.jsonfile.Save the file and then open the session in NaviNIBS.

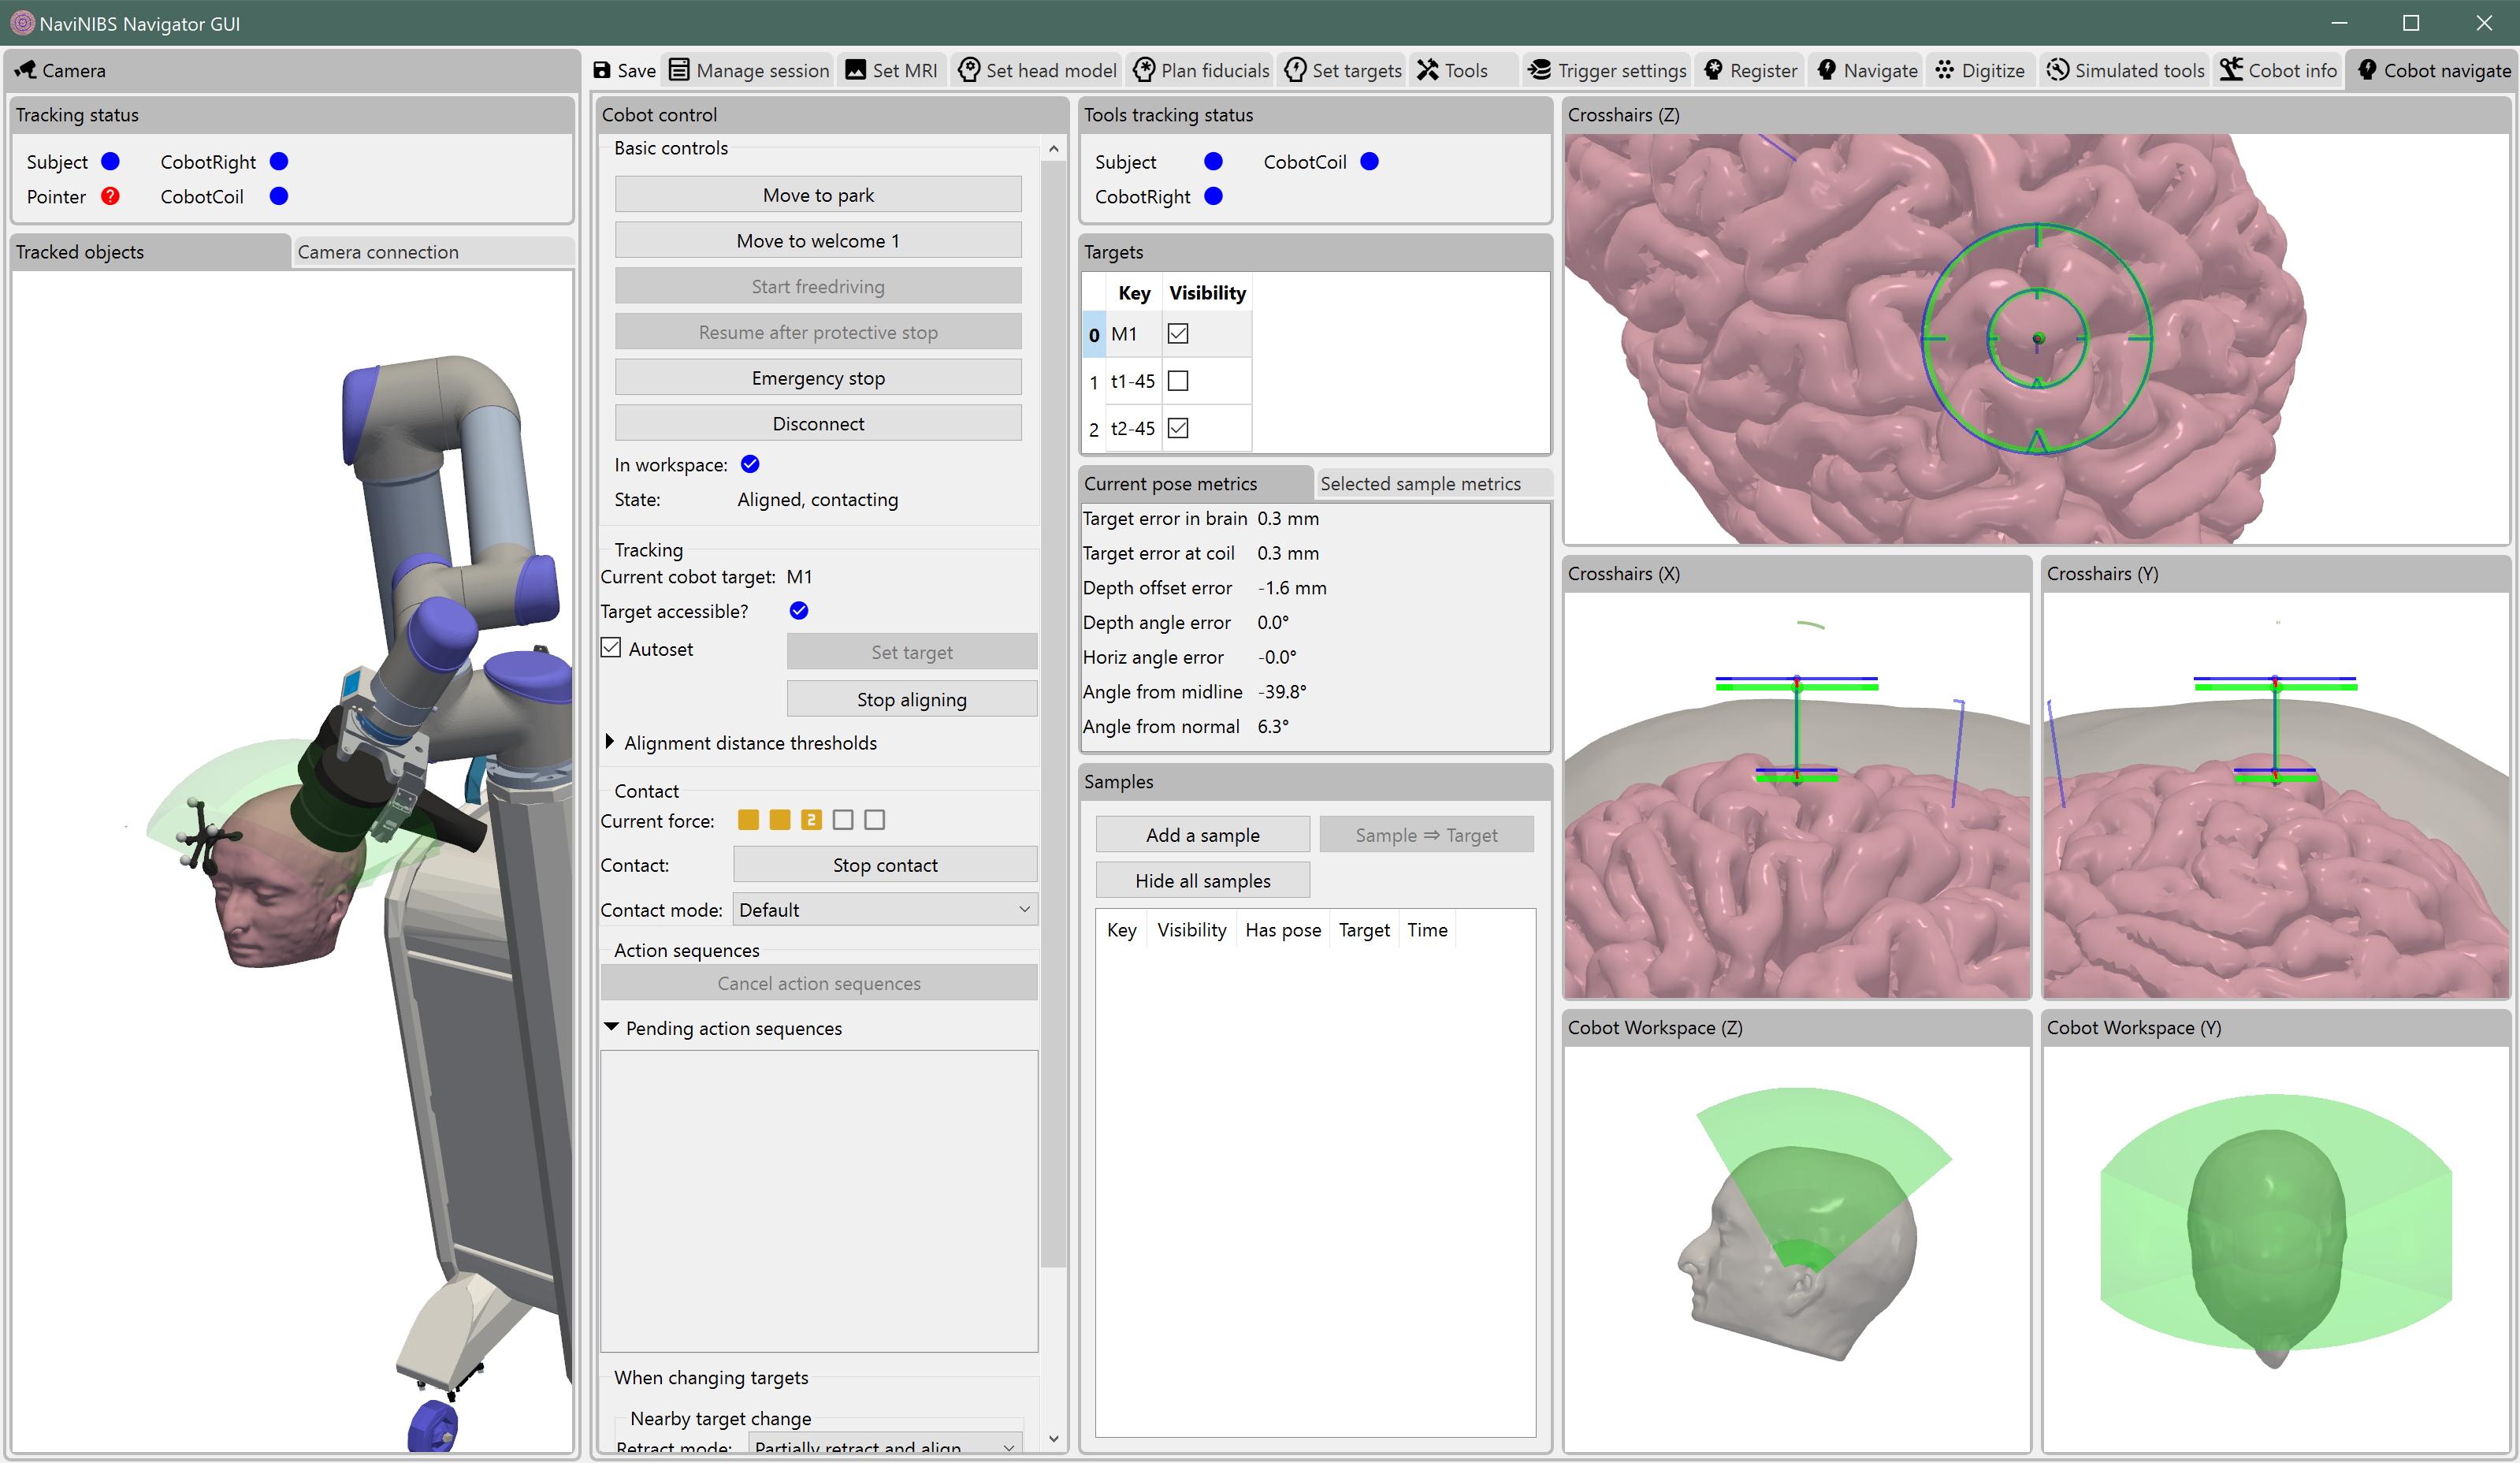
- When using the Cobot, a TMS coil may be tracked in one of two ways:
Indirect coil pose estimate. Optical tracking system (e.g. NDI or OptiTrack) estimates the position of the Cobot cart, and NaviNIBS plus the Cobot API uses precise robotic arm kinematics to estimate the coil pose. No optical markers are needed on the coil.
Direct coil pose estimate. The optical tracking system estimates the coil pose directly based on optical markers placed on the coil. A transform between the Cobot’s idea of coil position and the optical tracking system’s idea of coil position is continually updated behind the scenes by NaviNIBS.
With option (1.), any error in estimating pose of the Cobot cart is magnified along the length of the robotic arm, leading to potential errors in coil position. With option (2.), the optical tracking system must be able to see the coil at all times, but pose can typically be estimated more precisely. Option (2.) is therefore generally recommended.
To use an optically-tracked TMS coil with the Cobot, just define two TMS coil tools: a typical coil tool (like would be used for tracking a coil without the Cobot), and a second coil tool with key CobotCoil (e.g. the coil tool from the CobotTools.json imported when following the instructions above). Keep both tools marked as Active in NaviNIBS; the first active coil tool in the list will automatically be used for primary targeting localization.
Network connections
        flowchart LR
    Camera[NDI camera] --> Cobot
Standalone Cobot usage without neuronavigation.
        flowchart LR
    Camera[NDI camera] --> NaviNIBS <--> Cobot
Network connections with two dedicated network ports on NaviNIBS computer.
        flowchart TD
    Camera[NDI camera] --> Switch[Ethernet switch]
    NaviNIBS <--> Switch[Ethernet switch]
    Cobot <--> Switch[Ethernet switch]
Network connections with shared switch (recommended).
During typical Cobot usage without NaviNIBS (or another neuronavigation system), the Cobot may connect to an NDI camera directly over an ethernet connection. However, when NaviNIBS is controlling the Cobot, the Cobot does not need to connect to the NDI camera.
Instead, the NDI camera may be connected to the same network as the computer running NaviNIBS (if using NDI for pose tracking). The Cobot should also be connected to the same network as the computer running NaviNIBS. All three devices (computer, Cobot, and NDI camera) can be connected to a shared local ethernet switch, in which case the Cobot or the computer will be able to connect on demand to the camera depending on whether the Cobot is used in standalone mode or controlled by NaviNIBS, without requiring frequent physical cable changes.
Warning
The NDI camera and Cobot should typically only be connected to a local network, not to a wide-area network (WAN) or the internet.
Specify Cobot IP address
NaviNIBS needs to know where to find the Cobot on your local network. You may find this address in your Cobot settings. Here, we will use an example address of 192.168.1.81. Currently, this value is not editable within the NaviNIBS GUI. In your session directory, you must edit the SessionConfig_Addon_NaviNIBS_Cobot.json file to include the Cobot IP address:
{
    "addonInstallPath": "..\\NaviNIBS_Cobot",
    "cobotControl": {
        "cobotAddr": "192.168.1.81"
    }
}
Usage
Warning
Make sure to review Axilum documentation for safe Cobot operation and always have a physical emergency stop button accessible to the subject and research staff.